
Ngl.new_marker
Adds new markers to the existing table of markers.
Prototype
nmark = Ngl.new_marker(wks, marker_strings,
             font_nums, xoffset=0., yoffset=0.,
             aspect_ratio=1., size=1., angle=0.)
Arguments
wksThe identifier returned from calling Ngl.open_wks.
marker_stringsA single string (or list of strings) to indicate what characters to pick from the font number (or list of font numbers) in the font_nums argument below. The strings will usually be a single character, but that is not a requirement. For example, you could create "Hello world" as a marker (see Example 5).
font_numsAn integer scalar (or list of scalars, having the same length as the list of strings in the marker_strings argument) containing the font table numbers indicating which font table to use for the characters in the marker strings.
xoffset=0., yoffset=0.Optional scalar arguments that are the X and Y offsets of the marker. The units for these offsets are character widths, that is, an x offset of 1. would move the marker a character width to the right. In most cases these offsets are used for only slight adjustments. The default value of 0.0 indicates no offset.
aspect_ratio=1.An optional scalar that is the aspect ratio of the marker. A value greater than 1. stretches the marker in the vertical direction, and a value less than 1. stretches it in the horizontal direction. The default of 1.0 produces a square aspect ratio. A value less than 0. will be set to the default.
size=1.An optional scalar size multiplier for the default marker size. (a size less than 0. will default to 1.) A value of 2. doubles the marker size, and value of 0.5 halves the marker size. The default is 1.0. A size less than 0. will be set to the default.
angle=0.An optional scalar that is the angle at which to rotate the marker counter-clockwise; it must be greater than or equal to 0. The default of 0.0 produces no rotation.
Return value
nmarkAn integer representing a marker index into the current marker table that contains the new marker added.
Description
Given a workstation, a marker and font table number, and values for the X/Y offset, size, aspect ratio, and angle, this function adds the given marker to the current marker table, and returns a list of unique indexes that represent the locations of the new markers in the marker table.
You can use these new markers in any resource that allows you to set a marker index.
The markers can be selected from any one of the characters in the many font tables. If you like one of the existing markers, but just want to tweak some aspect of it, then below is a table that lists each marker index along with the character, font number, X and X offsets, and aspect ratio used for each marker.
| index | description | character | font table |
X offset | Y offset | aspect ratio |
size | angle |
|---|---|---|---|---|---|---|---|---|
| 1 | dot (small filled circle) | Z | 37 | 0.0 | 0.0 | 1.3125 | 0.175 | 0.0 |
| 2 | plus sign | + | 18 | 0.0 | 0.075 | 1.3125 | 0.95 | 0.0 |
| 3 | asterisk | * | 1 | 0.0 | 0.0 | 1.3125 | 1.0 | 0.0 |
| 4 | hollow circle | x | 19 | 0.0 | 0.075 | 1.3125 | 1.2 | 0.0 |
| 5 | cross (x) | U | 18 | 0.0 | 0.075 | 1.3125 | 1.1 | 0.0 |
| 6 | hollow square | Z | 19 | 0.0 | 0.083 | 1.3125 | 1.45 | 0.0 |
| 7 | up pointing triangle | [ | 19 | 0.0 | 0.03 | 1.5 | 1.25 | 0.0 |
| 8 | down pointing triangle | X | 19 | 0.0 | 0.87 | 2.15 | 0.67 | 0.0 |
| 9 | diamond | \\ | 19 | 0.0 | 0.075 | 1.0 | 1.15 | 0.0 |
| 10 | left pointing filled triangle | ` | 19 | 0.0 | 0.08 | 1.5 | 1.55 | 0.0 |
| 11 | right pointing filled triangle | b | 19 | 0.0 | 0.08 | 1.5 | 1.55 | 0.0 |
| 12 | five-pointed star | ] | 19 | 0.0 | 0.0625 | 1.3125 | 1.1 | 0.0 |
| 13 | six-pointed star | m | 19 | 0.0 | 0.0725 | 1.3125 | 1.1 | 0.0 |
| 14 | circle with center dot | Z | 18 | 0.0 | 0.0 | 1.3125 | 0.8 | 0.0 |
| 15 | circle with cross | [ | 37 | 0.0 | 0.0 | 1.3125 | 0.8 | 0.0 |
| 16 | filled circle | Z | 37 | 0.0 | 0.0 | 1.3125 | 0.8 | 0.0 |
The values for xoffset and yoffset can be used to shift a marker slightly from its default location. For example, if you add a filled triangle (font table 34, letter 'u') to the marker table, you'll see that the default is such that the center of the triangle is the center location of this marker. If you want the tip of the triangle to be the center location instead, then tweak xoffset. A PyNGL script is given below that allows you to view an enlarged marker to determine if it needs to be adjusted.
See Also
Examples
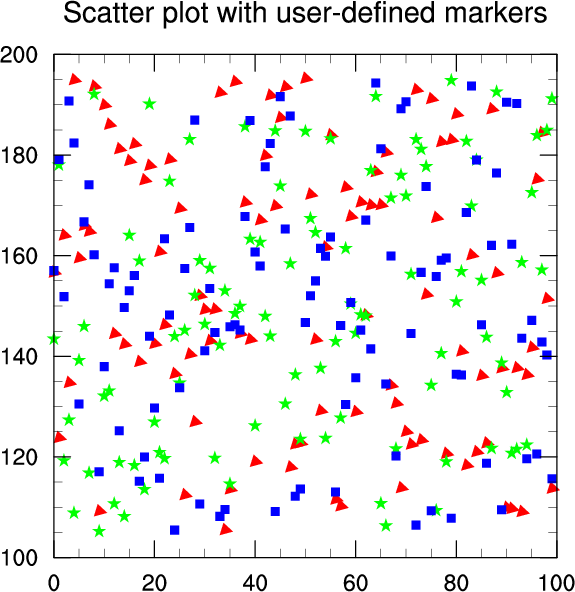
Example 1
See scatter2.py (output).
Example 2
This example adds a filled square to the marker table and keeps all of its default settings:
  mstring = "y"
  fontnum = 35
  xoffset = 0.0
  yoffset = 0.0
  ratio   = 1.0
  size    = 1.0
  angle   = 0.0

  new_index = Ngl.new_marker(wks, mstring, fontnum, xoffset, yoffset, ratio, size, angle)
To make this same marker twice as high as it is wide, change the value for the ratio:
  ...
  ratio = 2.0
  ...
  new_index = Ngl.new_marker(wks, mstring, fontnum, xoffset, yoffset, ratio, size, angle)
Example 3
This example adds a filled triangle to the marker table and rotates it so that the tip is pointing to the right:
  mstring = "u"
  fontnum = 34
  xoffset = 0.0
  yoffset = 0.0
  ratio   = 1.0
  size    = 1.0
  angle   = 270.0

  new_index = Ngl.new_marker(wks, mstring, fontnum, xoffset, yoffset, ratio, size, angle)
To shift this rotated triangle so that the center location is more towards the center of the triangle, set the X offset value:
  xoffset = 0.37
  ...
  new_index = Ngl.new_marker(wks, mstring, fontnum, xoffset, yoffset, ratio, size, angle)
Note: the rotation is applied first, then the offsets.
Example 4
This example draws an enlarged selected marker so that you can see it in more detail and determine if you want to adjust any of the offset, ratio, size, and/or angle parameters:
#
# This script allows you to view a marker up close and determine if
# you want to change anything about it, like the X/Y offsets, the
# aspect ratio, size, and/or angle.
#
# The code of interest for the user should be in the section that
# starts with the comment "Create a new marker..."
#

import Ngl

#
# Open a workstation and change the color table.
#
wkres = Ngl.Resources()
wkres.wkColorMap = ["white","black","YellowGreen","red","gray","SpringGreen"]
wks_type = "ps"
wks = Ngl.open_wks(wks_type,"marker",wkres)

xyres                       = Ngl.Resources()
xyres.nglDraw               = False
xyres.nglFrame              = False

x = [0.,1.,1.,0.,0.]
y = [0.,0.,1.,1.,0.]

#
# Create a new marker, keeping all its default settings.
# This particular marker is a filled triangle. You can change
# "mstring" and "fontnum" to whatever  character in a particular font
# table that you want to create a marker from.
#
mstring = "u"
fontnum = 34
xoffset = 0.0
yoffset = 0.0
ratio   = 1.0
size    = 1.0
angle   = 0.0
marker_type = "triangle"

xvert = [0.45,0.55]
yvert = [0.50,0.50]
xhorz = [0.50,0.50]
yhorz = [0.45,0.55]


#
# Set up marker resources.
#
mkres               = Ngl.Resources()
mkres.gsMarkerSizeF = 0.5
mkres.gsMarkerColor = "YellowGreen"

#
# Set up some line resources.
#
lnres                  = Ngl.Resources()
lnres.gsLineColor      = "Red"
lnres.gsLineThicknessF = 4.0

xyres.tiMainString  = "Marker examination: " + marker_type
canvas = Ngl.xy(wks,x,y,xyres)

#
# Create and draw the marker.
#
mkres.gsMarkerIndex = Ngl.new_marker(wks,mstring,fontnum, \
                                     xoffset,yoffset,ratio,size,angle)
marker = Ngl.add_polymarker(wks, canvas, [0.5], [0.5], mkres)

#
# Draw a little red cross showing center of marker. If you don't like
# where the center is, you can go back and modify xoffset and/or
# yoffset above.
#
line1 = Ngl.add_polyline(wks, canvas, xvert, yvert, lnres)
line2 = Ngl.add_polyline(wks, canvas, xhorz, yhorz, lnres)

Ngl.draw(canvas)
Ngl.frame(wks)                           # Advance the frame.

Ngl.end()
Example 5
This example shows how to use several characters from a given font as a single marker. It also illustrates using all possible argument defaults for Ngl.new_marker.
import Ngl

wks = Ngl.open_wks("ps","marker")

#
#  Using all possible default arguments, create a "Hello world"
#  marker using the Helvetica-bold font (font number 21).
#
new_index = Ngl.new_marker(wks, "Hello world", 21)

#
#  Plot the new marker at several positions using Ngl.y.
#
res                     = Ngl.Resources()
res.xyMarkLineMode      = "Markers"    # Default is to draw lines.
res.xyMonoMarkLineMode  = True         # Default is only one marker style.
res.xyMarkers           = new_index    # Set new marker

plot = Ngl.y(wks, [0.0, 0.25, 0.5, 0.75, 1.0], res)

Ngl.end()